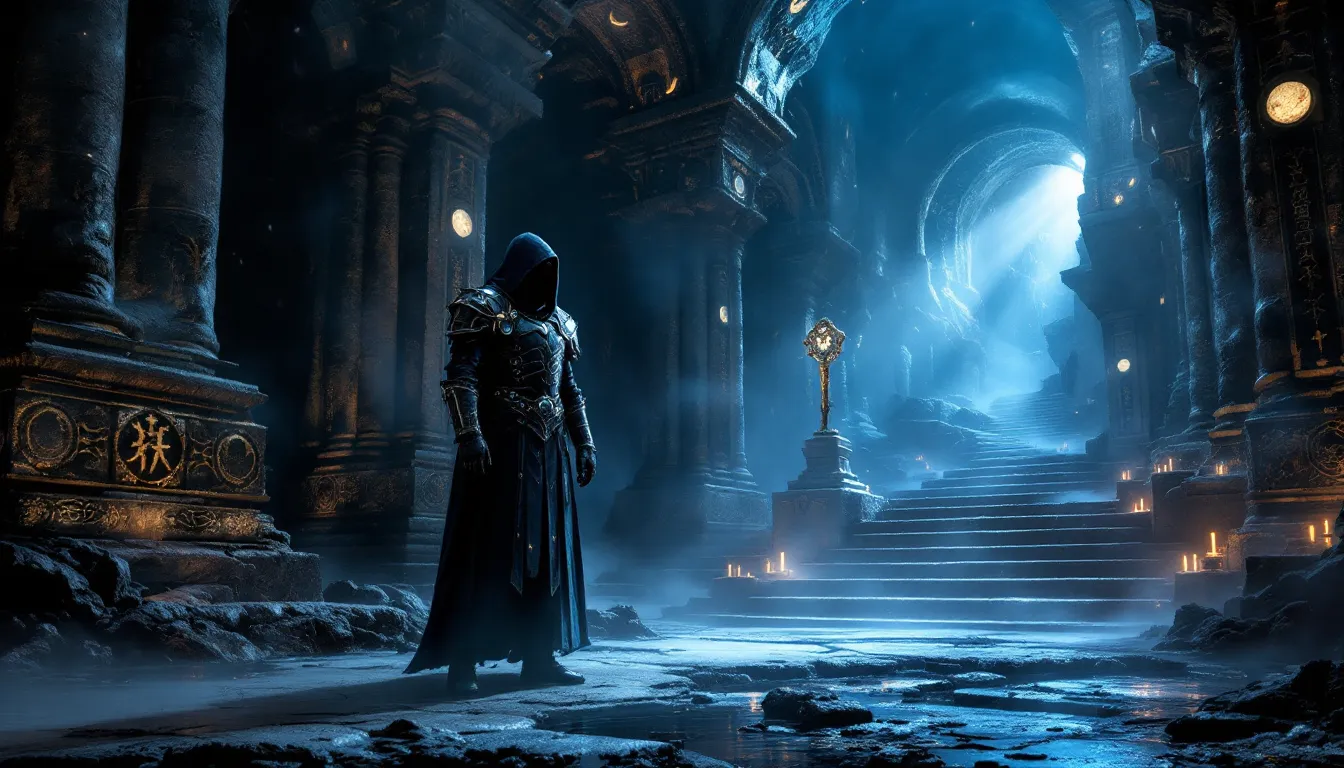
The Thieves Guild questline in Skyrim culminates in one of the most atmospheric and lore-heavy missions in the entire game. After hours of burglary, political manipulation, and navigating Riften’s shadowy underworld, you’re finally ready to close the book on Mercer Frey’s betrayal. But Darkness Returns isn’t just another dungeon crawl, it’s a mechanically dense quest with puzzle elements, a climactic boss fight, and a critical choice that defines your character’s relationship with Nocturnal for the rest of your playthrough.
Whether you’re running a sneaky Khajiit archer, a battle-mage hybrid, or a heavy armor bruiser who joined the Guild for the perks, this walkthrough covers everything you need to clear Darkness Returns without frustration. We’ll break down the Pilgrim’s Path puzzle, optimal combat strategies for Mercer, and which Nightingale power actually deserves a spot on your build. Let’s get into it.
Table of Contents
ToggleKey Takeaways
- Darkness Returns is the final Thieves Guild quest in Skyrim where you confront Mercer Frey in the Twilight Sepulcher to recover the stolen Skeleton Key and restore Nocturnal’s favor.
- The Pilgrim’s Path puzzle requires you to step on five floor tiles in a specific moon-symbol sequence shown on the chamber wall to proceed past the gate safely.
- Mercer Frey is defeated by using Aura Whisper shout to counter his invisibility, maintaining distance with ranged weapons, and exploiting the arena’s pillars for line-of-sight breaks.
- Your final Nightingale power choice—Agent of Shadow (invisibility) is considered the most versatile and powerful option for any build, while Agent of Subterfuge suits stealth playstyles and Agent of Strife aids combat-heavy characters.
- Returning the Skeleton Key is permanent and blocks you from keeping the unbreakable lockpick, so many players wait until Lockpicking reaches 100 and the Unbreakable perk is unlocked before completing the quest.
- The quest only unlocks through story progression after Trinity Restored and does not require the optional radiant guild jobs needed for Guild Master promotion and unique armor sets.
What Is the Darkness Returns Quest in Skyrim?
Darkness Returns is the final main quest in the Thieves Guild storyline. It picks up immediately after Trinity Restored, when Karliah reveals that Mercer Frey has stolen the Skeleton Key, a Daedric artifact tied to Nocturnal, the patron deity of thieves, and fled to the Twilight Sepulcher.
The quest requires the player to journey to this remote Shrine of Nocturnal, navigate a dungeon filled with traps and enemies, confront Mercer in a flooded inner sanctum, and eventually return the Skeleton Key to its rightful place. Completion restores the Thieves Guild’s favor with Nocturnal and unlocks the final Nightingale powers.
Unlike most Skyrim quests, Darkness Returns is linear and story-driven. There’s no branching dialogue or alternate outcomes, Mercer dies, the Key is returned, and you choose one of three permanent blessings. The quest is available on all platforms (PC, Xbox, PlayStation, and Nintendo Switch) and has remained mechanically unchanged since the original 2011 release, though the Anniversary Edition and Special Edition include stability improvements that reduce common bugs.
This is the payoff for every contract you ran in Riften, every special job you completed across Skyrim’s major cities, and every conversation with Brynjolf. If you’ve been holding onto the Skeleton Key for lockpicking cheese, this is where you say goodbye.
Prerequisites and How to Unlock Darkness Returns
Darkness Returns doesn’t appear in your journal until you’ve cleared multiple prerequisite quests. Here’s the exact sequence.
Completing the Thieves Guild Questline
You must finish the core Thieves Guild story arc in this order:
- A Chance Arrangement – Join the Guild through Brynjolf in Riften’s marketplace.
- Taking Care of Business – Intimidate three merchants for Brynjolf.
- Loud and Clear – Complete your first heist at Goldenglow Estate.
- Dampened Spirits – Poison the mead at Honningbrew Meadery.
- Scoundrel’s Folly – Steal Sabjorn’s incriminating documents.
- Speaking With Silence – Work with Karliah to discover Mercer’s betrayal.
- Hard Answers – Translate Gallus’s journal in the Dwemer ruins.
- The Pursuit – Track Mercer to Irkngthand and witness his theft of the Skeleton Key.
- Trinity Restored – Become a Nightingale alongside Karliah and Brynjolf at Nightingale Hall.
Once Trinity Restored concludes, Karliah tells you to meet her at the Twilight Sepulcher. That’s when Darkness Returns officially begins.
Restoring the Thieves Guild to Former Glory
Here’s where players get confused: you do NOT need to complete the additional “Restore the Thieves Guild” radiant quests to start Darkness Returns. Those side jobs (the ones Delvin and Vex hand out to establish Guild influence in Solitude, Markarth, Whiterun, and Windhelm) are optional and only required if you want to become Guild Master and access the Guild Master’s Armor set.
Darkness Returns unlocks purely through story progression. The radiant jobs unlock afterward and are tied to separate rewards. Don’t grind Vex’s “steal three flawless emeralds” quests thinking they’re mandatory, they’re not.
Step-by-Step Walkthrough: Completing Darkness Returns
The quest is structured as a dungeon dive with light environmental puzzles and a scripted boss encounter. Here’s how to clear it efficiently.
Speaking with Karliah at the Twilight Sepulcher
Fast travel to the Twilight Sepulcher. It’s located in the mountains west of Falkreath, near the southwestern edge of the map. Karliah and Brynjolf are waiting outside.
Exhaust Karliah’s dialogue. She explains that the Sepulcher is sacred to Nocturnal and that Mercer’s theft has caused the inner shrine to flood. Brynjolf chimes in with moral support, but he’s not coming with you, this is a solo run.
Once dialogue ends, enter the Sepulcher. Save before stepping inside.
Navigating the Twilight Sepulcher Dungeon
The dungeon is a mix of Nordic architecture and Nightingale motifs. Enemies include Nightingale Sentinels (tough spectral warriors with high armor and frost damage) and environmental traps like tripwires and pressure plates.
Key areas:
- Entry Hall: A handful of Sentinels patrol the first chamber. Stealth characters can sneak past: combat builds should use choke points.
- The Armory: Contains a chest with leveled loot and a Nightingale Bow if you didn’t loot one earlier. Worth grabbing for archers.
- The Crypt: More Sentinels. Watch for floor traps that trigger spike gates.
Stick to the main path. The Sepulcher is linear, so there’s no risk of getting lost. Use your compass marker to track Karliah if you lose orientation.
Solving the Pilgrim’s Path Puzzle
This is the only true puzzle in the quest. You’ll reach a large chamber with a locked gate and five circular floor tiles arranged in a path. Each tile depicts a different symbol.
On the wall to your right, a stone plaque reads:
*”The Pilgrim’s Path: Follow in the footsteps of the Pilgrim. From darkness, return across the Ebonmere.”
The solution is simple:
- Look at the Pilgrim’s Path bas-relief on the wall. It shows a figure walking across five tiles in a specific sequence.
- Step on the tiles in the same order shown in the carving.
The correct sequence (left to right as you face the gate):
- Half Moon (bottom left)
- Full Moon (top center)
- Crescent (middle right)
- Empty Circle (bottom right)
- Full Moon (top center, again)
If you step on the wrong tile, poison darts fire from the walls. They deal minor damage but reset your progress. Just start over.
Once you complete the pattern, the gate opens and you proceed to the Inner Sanctum.
Defeating Nightingale Sentinel and Reaching the Inner Sanctum
Before the final confrontation with Mercer, you’ll face a mini-boss: the Nightingale Sentinel Captain. This is a beefed-up version of the standard Sentinels, with higher HP and frost-enchanted dual wielding.
Strategy:
- Melee: Block or dodge his power attacks. He staggers easily with shield bashes.
- Ranged: Kite around the pillars. His pathing AI gets confused in tight spaces.
- Magic: Frost resistance helps, but fire spells melt him quickly.
Loot his body for a leveled enchanted weapon, then descend the stairs into the flooded Inner Sanctum where Mercer waits.
Confronting and Defeating Mercer Frey
Mercer Frey is the toughest NPC opponent in the Thieves Guild questline. He dual-wields enchanted blades, spams invisibility, and has high DPS output for a non-dragon boss.
Combat Strategy and Recommended Gear
Mercer’s moveset:
- Dual-wield flurry attacks with high bleed damage.
- Invisibility spells that reset aggro and let him reposition.
- Paralyze shouts if you’re in melee range too long.
- High armor rating due to his Nightingale gear.
Recommended loadout:
- Detect Life or Aura Whisper shout: Counters his invisibility. Aura Whisper is clutch here.
- Ranged weapons: Bows or destruction magic let you maintain distance. Many gaming guides recommend ranged tactics for this fight specifically.
- Poison: Weakness to Magic or Ravage Health vials amplify damage.
- Resist Magic potions: Reduces his paralyze duration.
The arena is a partially flooded chamber with stone pillars. Use line-of-sight to break his targeting when he goes invisible. If you’re a stealth build, you can still sneak-attack him when he’s visible, just don’t expect easy backstabs.
Phase breakdown:
- Phase 1 (100–50% HP): Mercer fights aggressively but predictably. Kite, dodge, punish.
- Phase 2 (50–0% HP): He spams invisibility more frequently. Use Aura Whisper on cooldown.
On Legendary difficulty, this fight can take several minutes. On lower difficulties, a well-geared character can burn him in under 30 seconds.
Escaping the Collapsing Sanctum
Once Mercer dies, loot his body for the Skeleton Key, his enchanted armor pieces, and a bunch of gold. Then the ceiling collapses.
You’re now in a rapidly flooding chamber. Swim upward through the broken stonework. The path is linear, just keep moving toward the surface. Karliah and Brynjolf are waiting when you emerge.
No combat here, just mild panic and camera shake. Don’t overthink it.
Choosing Your Nightingale Power: Which Agent of Nocturnal Is Best?
After escaping, you’ll activate the Twilight Sepulcher’s Shrine and choose one of three permanent Nightingale powers. This is a one-time decision per playthrough, so choose carefully.
Each power is a lesser power (usable once per day) that scales with your level. Here’s the breakdown.
Agent of Subterfuge: Stealth Builds
Effect: Causes nearby enemies to attack each other for 30 seconds.
Best for: Pure stealth rogues, illusion mages, pacifist runs.
Why it’s strong: Turns entire enemy groups against each other, letting you sit back and watch. Especially useful in dungeons with multiple enemy factions (e.g., bandits vs. draugr). The chaos buys time for repositioning or escape.
Why it’s weak: Limited utility in boss fights or against solo enemies. If you’re already one-shotting with sneak attacks, this feels redundant.
Agent of Strife: Combat-Focused Characters
Effect: Absorb 100 points of health from a target.
Best for: Warriors, spellswords, anyone who gets hit frequently.
Why it’s strong: A panic button that heals you and damages an enemy simultaneously. Great sustain for prolonged fights, especially on higher difficulties where healing is scarce.
Why it’s weak: Only affects one target. Restoration spells or potions often heal more efficiently. The scaling doesn’t keep pace with endgame HP pools.
Agent of Shadow: Balanced Playstyles
Effect: Grants invisibility for 120 seconds.
Best for: Hybrid builds, exploration-focused players, and anyone who values versatility.
Why it’s strong: Two full minutes of invisibility is absurd. You can sneak through entire dungeons, reposition mid-combat, or escape when overwhelmed. Works in any situation. This is the most universally useful power and the community favorite for a reason.
Why it’s weak: If you’re already running high Sneak or have invisibility spells/potions, it feels less impactful.
Verdict: Agent of Shadow is the meta pick. The flexibility and duration outweigh the niche benefits of the other two. Agent of Subterfuge is fun for specific builds. Agent of Strife is the weakest unless you’re role-playing a vampire or necromancer who needs on-demand lifesteal.
Rewards and Loot from Darkness Returns
Completing Darkness Returns unlocks several rewards, both immediate and long-term.
Guild Master Armor and Unique Items
Upon finishing the quest, you gain:
- Your chosen Nightingale power (permanent lesser power).
- Access to the Twilight Sepulcher as a repeatable location for visiting Nocturnal’s shrine.
- Mercer’s loot: His enchanted Nightingale armor pieces (if you didn’t already have them), his dual-wielding blades, and roughly 3,000–5,000 gold depending on your level.
If you’ve also completed the five special jobs in each major city (Solitude, Whiterun, Markarth, Windhelm), Brynjolf promotes you to Guild Master back in the Ragged Flagon. This unlocks:
- Guild Master’s Armor Set: A unique light armor set with carry weight bonuses and lockpicking improvements.
- The Guild Master’s Tribute Chest: A respawning chest in the Cistern that fills with gold and gems periodically.
These rewards are separate from Darkness Returns itself, but many players complete the radiant quests immediately after to cap off the Guild storyline.
Accessing the Skeleton Key’s Return Bonus
Returning the Skeleton Key means you lose the unbreakable lockpick. For many players, this is a tough trade. The Key trivializes lockpicking but blocks Nightingale power progression.
If you want to keep the Skeleton Key indefinitely:
Simply don’t complete Darkness Returns. The quest will remain in your journal, and you can use the Key forever. You won’t get the Nightingale powers or the Guild Master promotion, but you’ll never break another lockpick.
Most players eventually return the Key once their Lockpicking skill hits 100 and they’ve unlocked the Unbreakable perk, which makes the Key redundant.
Common Issues, Bugs, and Troubleshooting Tips
Darkness Returns is relatively stable, but Skyrim’s engine being what it is, bugs happen. Here are the most common and how to fix them.
Quest Not Starting or Karliah Missing
Symptom: Trinity Restored completes, but Karliah doesn’t travel to the Twilight Sepulcher. She’s stuck at Nightingale Hall or vanished entirely.
Fixes:
- Wait 24–48 in-game hours. NPCs sometimes lag when traveling to remote map markers.
- Fast travel away and back. This forces the game to reload NPC positions.
- If playing on PC, open the console and type
prid 00058F1A, thenmoveto player. This teleports Karliah directly to you.
Prevention: Don’t skip Trinity Restored’s ending dialogue. Let Karliah finish her entire speech before leaving Nightingale Hall.
Glitches During the Mercer Frey Fight
Symptom: Mercer becomes invincible, gets stuck in terrain, or the flooding sequence doesn’t trigger after his death.
Fixes:
- Invincibility glitch: Reload a save from before entering the Inner Sanctum. This is usually caused by script lag from too many active quests or mods.
- Stuck in terrain: Use Unrelenting Force to knock him loose. If that fails, reload.
- Flooding doesn’t trigger: Loot Mercer’s body completely, then wait 10 seconds. The script checks for the Skeleton Key in your inventory before starting the collapse.
On PC, the Unofficial Skyrim Special Edition Patch from Nexus Mods addresses most of these issues. Console players should ensure their game is fully updated.
If all else fails, consult community resources. Skyrim’s modding scene has documented nearly every edge case across different creatures and encounters over the years.
Tips for Different Character Builds and Playstyles
Darkness Returns adapts well to any build, but some approaches smooth out the rough edges.
Stealth Archer:
- Abuse the Sepulcher’s shadows. Sentinels have poor detection ranges.
- Bring paralysis poisons for Mercer. Landing a poisoned arrow while he’s invisible is peak satisfaction.
- Pick Agent of Shadow for the meme synergy.
Two-Handed Warrior:
- The narrow corridors favor crowd control. Use sweep attacks to hit multiple Sentinels.
- Bring stamina potions. Mercer’s flurry attacks drain your block meter fast.
- Agent of Strife gives you sustain, but Agent of Shadow lets you reposition when surrounded.
Mage (Destruction/Conjuration):
- Summon Dremora Lords and let them tank Mercer. AI vs. AI is always entertaining.
- Frost magic is resisted by Sentinels. Stick to fire or lightning.
- Agent of Subterfuge pairs beautifully with Frenzy spells for total chaos.
Hybrid/Spellsword:
- You have the most flexibility. Swap between melee and range as needed.
- Use bound weapons to save inventory slots for potions and scrolls.
- Agent of Shadow is versatile enough to cover any situation.
Vampire/Werewolf:
- Werewolf form trivializes the entire dungeon. Sentinels can’t keep up with your DPS.
- Vampires benefit from Agent of Strife’s lifesteal, though it’s redundant if you have Vampiric Drain.
No matter your build, quicksave frequently. Skyrim’s jank is part of the experience, but losing 20 minutes to a bad autosave isn’t.
Conclusion
Darkness Returns delivers a solid conclusion to the Thieves Guild arc. It’s not the longest or most mechanically complex quest in Skyrim, but it nails the atmosphere and gives you a meaningful choice with the Nightingale powers. Mercer’s fight has enough teeth to feel rewarding, and the Pilgrim’s Path puzzle, while simple, breaks up the dungeon crawl nicely.
Whether you’re rushing through on your tenth character or savoring every dialogue line on a first playthrough, the quest holds up. Just remember: once you return that Skeleton Key, it’s gone for good. Make peace with that before you activate the shrine.
Now get back to the Ragged Flagon and start those radiant jobs if you want that Guild Master armor. Brynjolf’s waiting.